8.18.2016

Mason's birth story

Mason's birth was such a different experience than Harrison's. This time I got induced. That wasn't really the plan, but everything worked out so perfectly we chose to go ahead with the induction. There were many factors that made it work out perfectly.

My due date was August 20th. There were a few worries I had about this. For one, David started a new job a few weeks ago in Salt Lake which requires him to commute 2 hours door to door if he rides the train, or an hour and a half in the car when he's stuck in traffic. We weren't sure how much time he'd really be able to take off. Not that where he works wouldn't let him of course, but it's pretty demanding on his time and he's usually receiving emails all night long. I've also had a horrendous cold and knew if I had to breath on my own for contractions, it'd be terrible. On the 17th my sister in law started work again and she was our plan to have a place for Harrison to stay if it was during the week while we were in the hospital. David's mom and dad are coming on the 21st, so if we waited and he came between the 17th and 21st, we'd have to have him go to a friend which I'd feel bad doing, draining so much of someone else's time. The main worry was my doctor was going out of town from the 13th until the 23rd of August. We went to him so he could deliver our baby, that was the point. I really didn't want someone else delivering our baby.  He's the best. I didn't think it would work out since my doctor only induces on Tuesdays and Thursdays because...as he puts it, why would I plan on purpose to work the weekend? Totally get it. But that didn't leave us with many options.

On Tuesday I went in for my 39 week appointment. My doctor checked me and said "well can I throw you a curveball?" He said my cervix was inducible and he could do it Friday at midnight. He normally doesn't do that but because he was going out of town on Saturday evening he was willing to do the late night weekend shift for me. Otherwise I'd have this baby while he was gone. I had looked at a calendar a month ago and thought, man I wish he would come the 13th. That day fit perfectly into our crazy schedule. I got my wish!

The 13th of August is special because it's David's grandfather's birthday. Harrison was born on his grandmother's birthday. That was another reason we thought the 13th would be great so these boys would share their great grandparents' birthdays.

On Thursday I spent hours trying to schedule the induction. Back and forth with the doctor's office and hospital. I was freaking out a bit that it might not work out. When the nurse finally called and told me I could come in Friday night at 11:30pm, I jumped for joy. Well as high as you can jump when you're 9 months pregnant. Friday I tried to keep as busy as possible to keep my mind from thinking about it too much. We went and played with friends, I took Harrison to Seven Peaks to swim, tried to "clean" up the house as best I could, and then when David got home from work I went and got a pedicure. Fantastic way to spend my last hours pregnant. The women I sat next to in the nail salon thought I was having twins...remember not to say that to a pregnant woman. Aside from the twin comment they were so sweet and couldn't get over me being in the salon a few hours before going to the hospital. It was kind of essential though. My toes had been seriously neglected.


Once I got home we drove over to my brother's house to drop off Harrison. Then David and I came back home to finish packing up. I put on makeup and fixed my hair. One of the nice things about knowing when you're having a baby. While we waited we watched Stranger Things. Save Will! And Barb! Before we left, David gave me a blessing. I knew everything would be ok and we'd all come out healthy on the other side.

It was strange walking into the hospital all calm and peaceful. Not in labor like last time. Since it was so late at night, it was dead. We didn't see anyone else besides nurses. A nurse came into our room to ask questions, get baby's heartbeat, and the IV going. She checked me and said I was 2 to 3 cm and 80% effaced. She never could get a consistent connection with the monitor, baby was moving around a lot. Eventually they had to do an internal one that was stuck on his head. Ouch. The IV was a challenge for her to get right too, but thankfully she only stuck me once. Then around 1am, my doctor came in and broke my water. Ever seen how they do that? It's basically a giant crochet hook. Yikes. Then we waited for contractions while the nurse steadily gave me more pitocin. I started feeling them soon after. They got the anesthesiologist in pretty quickly after I requested the epidural. He was amazing. He talked us through everything, explained all of it and was super gentle. Epidurals his way were meant to leave you numb, but still able to move your legs and feel pressure but not pain. That's exactly what happened. Weirdest feeling. My epidural with Harrison left me so numb David had to hold my legs to keep them from falling out of the stirrups.

Then we just waited. We watched the Olympics through everything which was a nice treat because we don't have cable. I tried to sleep, but it didn't really happen. It was better than Christmas Eve. The nurse came in to check me every half hour it seemed, maybe hour. Each time I had progressed further. Then around 4:50am I went from an 8 to a 10 within ten minutes. I had started feeling my contractions again and my little button for more meds wasn't working. So they called in the anesthesiologist who quickly gave me more. It worked just in time. My Dr. was covering for another doctor at another hospital and had multiple babies he was delivering that night. They called him to let him know I was ready to go. Right when I was ready another patient of his at our hospital was also ready. I didn't know who she was, but I really wanted to go first. No hard feelings lady! They said he'd check us both and see who would be the winner.

When he came in with all the nurses I'd assumed it was just to decide who would go first, but they got me into position and told me to push. I was surprised, it all seemed to happen so quickly. I apparently have the kind of hips that make my kids come out posterior, or sunny side up, face up. They're supposed to be face down. Harrison came out this way so our awesome Dr helped him out with forceps. After about 5 or 6 pushes with Mason, Dr got out the forceps. I pushed and he nudged. Then he told me to stop. He worked Mason out the rest of the way with himself. When his head was out everyone was looking at him. I couldn't see anything, kind of wish I did. Last time they asked if I wanted a mirror to which I promptly said no. Even with the grossness it would have been worth it. I did get to reach down and feel his face. I burst into tears. He came out soon after and cried a beautiful cry.  He looked just like Harrison to me. He continued to cry which made me even happier. Harrison didn't cry much so he was taken pretty quickly to the NICU for oxygen. I only got to hold him for a second before he was whisked away. This time no one was taking Mason anywhere.


He looked so perfect and still does. He never seemed to have the cone head or the puffy newborn face. His skin was perfectly pink and velvety. I cried and cried when I held him the first time. We've waited for him for a long time, which I'll get into another post. It all went better than I could have hoped. He arrived at 5:45am. Total labor time was only about 4 1/2 hours. Not bad at all. It was rather easy. The only downside was being up all night, left us completely wiped out Saturday. That day at the hospital David got on his computer to try and get some work done. Each day he gets a report with about 40 missionaries who have needs he has to take action on. He works in the pre-field area of the missionary department for the LDS church and if you know missionary work, it never stops or takes a holiday. Even when David is at home from work for the day he's hearing from people on the other side of the world who need assistance with something. On Saturday however he was shocked to see his report only had 2 people and one of them he passed on to another area because it wasn't his department. He's never ever seen it like that since he started working there. He only had one person. Huge blessing. We are so grateful how smooth everything went and continues to be.

Sunday night we came home. Turns out you go home 48 hours from when you deliver the baby. Leaving at 5:45am on Monday morning did not sound appealing, so we went home and enjoyed our own bed. Recovery has been ok for me. Each day is a little better. Still can't do too much. In fact poor Harrison I've been telling for weeks that when the baby comes out I'll finally be able to do more things with him. But now I can do even less than when I was pregnant. :) I have an amazing husband. He brought home flowers, cleaned the house, let me nap and sleep in, and always checks on his way home from work if I need anything. I don't know what I'd do without him.

Thank you to all who have visited and brought meals. What a huge relief since I haven't felt good enough to even make the freezer meals I prepared. For now I'll just go snuggle my beautiful baby boy.


9.23.2015

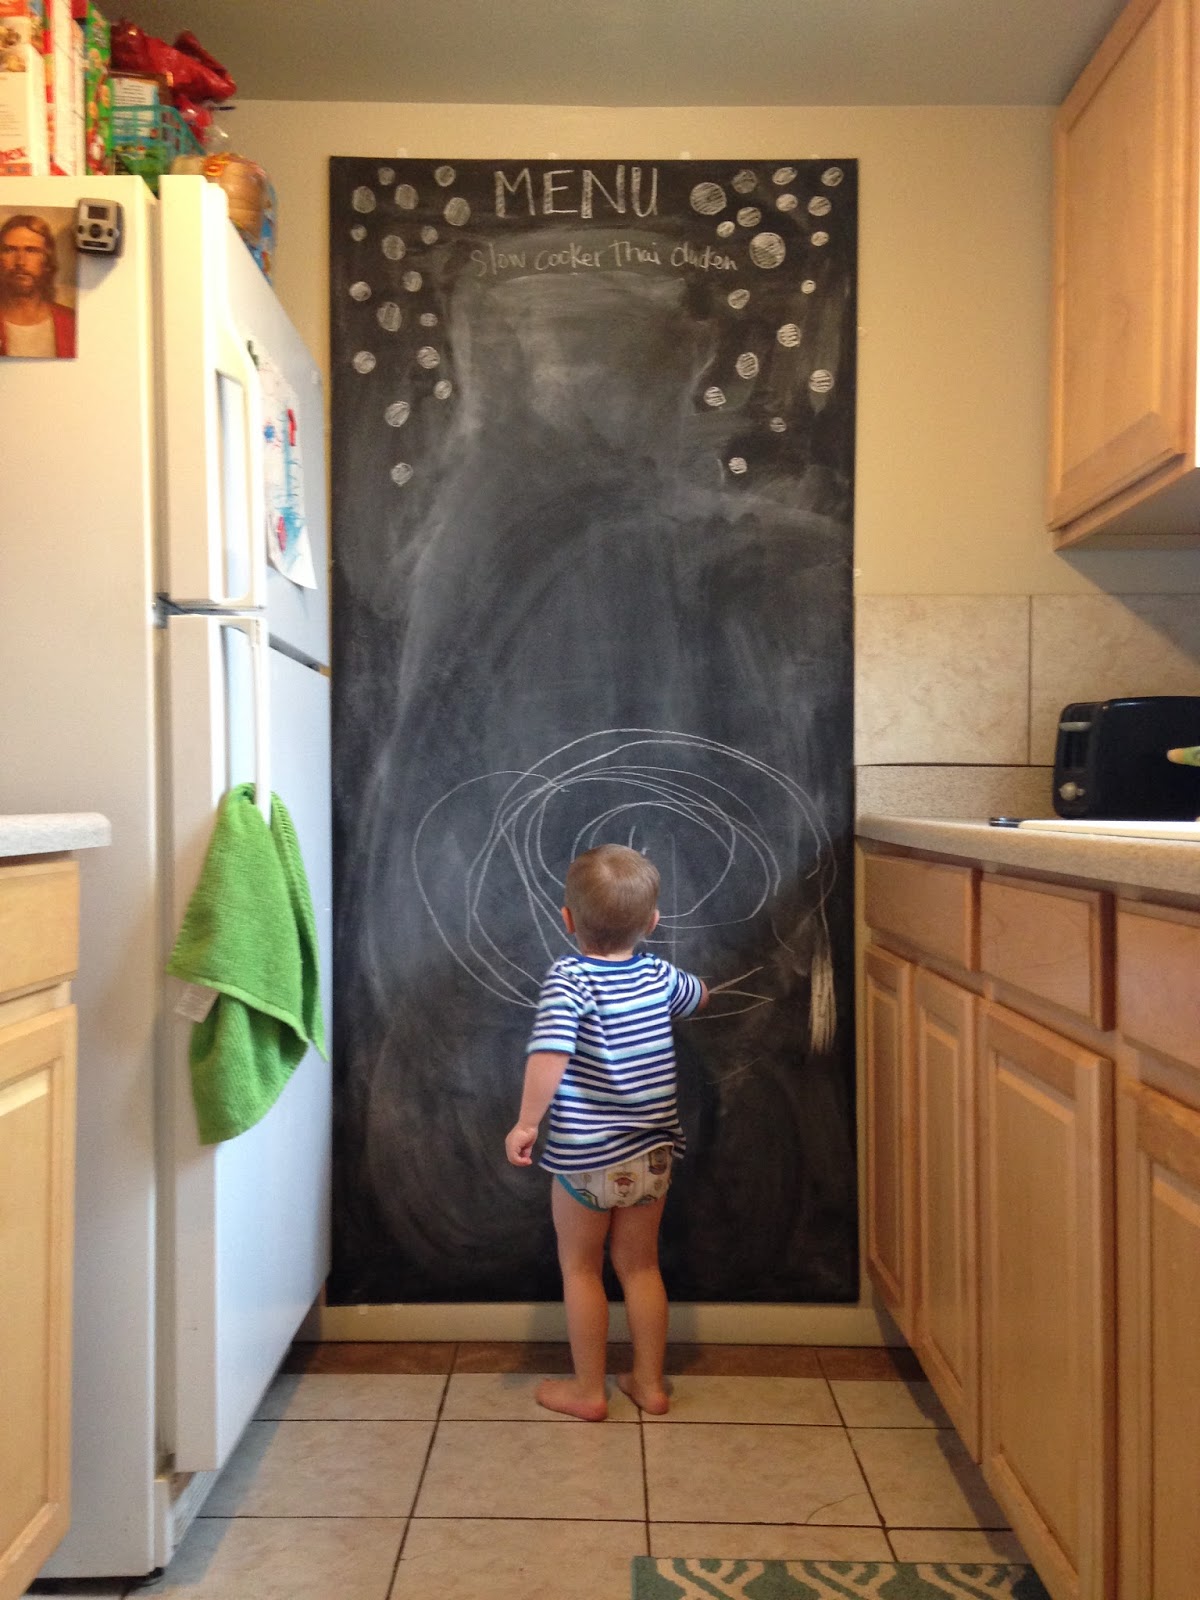
Fake chalkboard wall for renters

Our landlord won't let us paint the walls. Dangit. Most landlords don't let you. And they don't want us putting giant holes in the wall. We have a galley style kitchen and then end wall has just always seemed perfect for a chalkboard wall.  But there is an easy way to make a giant chalkboard, for cheap!


Materials Needed:

Hardboard tempered panel from Home improvement store
Chalkboard paint
Heavy duty Command strips
Paintbrush or roller


I just call this hardboard tempered panel stuff masonite board.  It's thin, smooth, and pretty lightweight. Pick up your board at Home Depot or Lowes. It's like 40 cents cheaper at Lowes.  14.48 as opposed to 14.92 for the 4ftx8ft board. Home Depot and Lowes will cut it down for you, and the first cut is free. At one of them 2 cuts are free, can't remember which. Measure your space beforehand and then have them cut it to size. If you do need an extra cut, it's only like 50 cents a cut.

Paint your cut board at home with chalkboard paint. I made my own using this tutorial. It's really simple to make, but mine came out pretty gritty. The textures not very smooth, but it works fine. You can pay $10 for the pre-made stuff, but making it was cheaper for me. I can live with the rough surface.

Then you just stick command strips all over the back edges. Don't put them in the middle or you have a hard time getting it off later! Leave the little pull tabs sticking off the edge so you can release them later. I needed 10 command strips to feel like it was secure, putting them on the top and sides. It helps to have two people to do this part.


Voila! This only took me one naptime to finish, most of that was paint drying time. 
Total cost for me: $15. 


I use this chalkboard all the time. For grocery items, picture backdrops, entertaining my son, posting our menu, love notes for me and the Mr. It's proven to be extremely useful and fun!


Have a rental? Get creative! Another rental tip: Use command strips to hang curtain rods!!!

Happy DIYing!


4.15.2015

Best, easiest, cutest handmade baby gift tutorial

I realized when my son was born, some baby items were nice to have, some not necessary, others essential! What I couldn't live without were burp cloths, my son spit up a lot and went through a lot of them.

I got several different kinds of burp cloths from folks. Some were soft minky type fabric, some were small, but my absolute favorite kinds were the ones made from padded cloth diapers. They're so absorbent, they're soft and the perfect size. I could have one all day, use it for multiple spit ups and it was still not super wet. My mom showed me how to make these a few years ago. They're so easy. I'm no professional seamstress but I can do this! I keep a stash of these on hand to give to friends having babies. They are seriously the best.


The above photo is of some burp clothes, hats, and headbands I made for a friend. She died over them and was so super excited. I got all the fabric from Joann's and from an old t-shirt.

To make the hats I used this tutorial from make it love it.

I can't find the original link where I made the headbands, but I love this tutorial from The Sweeter side of Mommyhood.

As for the burp cloths, let's get started shall we!


Materials:
     -Gerber brand pre folded 3 ply diapers, not the flat kind, those are big like blankets. I can find these at wal-mart, 10 for $12. You might have to hunt, but they're in the baby section.
     -Fat quarters of fabric. I love these because they're just the right length. They're only a buck at Joann's, and you can get a bunch of different colors/designs.
     -Fabric scissors
     -Pins
     -Sewing machine
     -Thread

Step one:

Lay out your fabric on the cloth diaper. I'm never very precise with this, I just line of the fat quarter over the center of the cloth diaper. I can usually get about 3 burp cloths made with one fat quarter.


 Step two:

Cut your fabric so it's about a 1/2" to 3/4" bigger than the strip in the middle of the cloth diaper. Make sure you leave enough fabric hanging off the edge of the cloth diaper.


Step three:

Fold under your extra 1/2" to 3/4" of fabric to make a nice straight edge. Pin it down. Do this around the whole strip of fabric. You could iron it, but I don't think it matters that much when you're doing something small like this.

Fold under the corners so they lay flat.


Step four:

Start in a corner. And sew about a 1/4" away from the edge of your fabric fold. any more than that and the fabric tends to flip up and doesn't look as nice. I always use a white thread cause I like the contrast, but you could use a coordinating thread if that fancies you! Sew all the way around!


Sewing tip:

When you get to the corners, don't cut thread and start all over. Just lift your sewing foot with the needle still in the fabric and turn it the direction you want to keep sewing! My high school art teacher taught me that and it saves me so much time!


Looks good enough for me!


Ta da you're done in no time at all! And then you have an adorable, cost effective, baby gift. Each one really only costs about $2 each! Not bad, not bad at all.


2.23.2015

Painting progress

The last few months for me have been a blur. A lot of my projects have been put on the back burner. But I'm excited to be getting back to what I love. I won't go into detail right now about all that has happened in the last few months, that' s a long story. It has nothing to do with anything I blog about. I'm sure I'll share more of those personal details at some point. But right now I'm just glad that Spring seems to peering through the clouds and warmth is returning to the ground.

Today though I want to share some of the process I went through went my last painting.

My friend Lindsay, who I love and adore, is moving this week, SAD! She is a hairstylist and traded me a new hair-do for a painting. I've done this trade thing a few times now and I really like how it works out :) She told me she wanted a hummingbird, corals, peaches, and turquoise. Which is perfect because those are most of MY favorite things.  Here is the end product:


I started out putting in blocks of bright happy colors, leaving white space for the bird.

Then I added in blocks of color to the body.

Then I started to have some fun with it. I through in some drips, some scribbles, and some blocks of lighter colors.


My husband said the red drips looked like the bird was bleeding...not really my intention. I hate when he's right. I therefore tried to cover a little bit of that up.


In the end, this became one of my most favorite paintings I've ever done. It combines all of what I like to do with art. This will sound really cheezy, but I kind of found myself as I did this. I've struggled back and forth between styles and techniques. I love to try lots of new things and that kicks me sometimes because then I can't decide what to stick with. But this...this is my happy place. I'll be adding prints of this to the shop soon since the original has a home. One of my goals this year is to add in originals to my etsy shop this year. That's the plan! Stay tuned!


9.15.2014

Creating a meaningful scripture journal


I have always been a big journal writer. My first one I started in 5th grade and each entry starts "Dear diary." It's so funny to read now. I have generally kept up ever since. If you haven't, start now! My family moved to a new town when I started high school. I made many friends, but didn't have many that I considered close confidants. My journal became my friend, the one I told everything. Each night I would write. It was therapeutic and helped me work through any issues I was having. My sketchbooks have also had this same sort of purpose for me, including working through artwork planning.  Needless to say I have A LOT of journals and sketchbooks.

The time I was most vigilant about this was as I was serving as a missionary for the Church of Jesus Christ of Latter day saints in Puerto Rico, Aruba, and Curacao.  I managed to fill 3 journals and 3 study journals. My journals I would write in each night about my day and report about miracles and all the wonderful plus discouraging things that would happen each day.  My study journals were sort of scrapbooks of my learning. They are highly valued possessions of mine. I would jump to save them in a fire.

I've tried several different methods of scripture study journaling, but the way I did it on my mission worked best for my brain. I'm going back to this type of organization as soon as I get my hands on the materials.

To create your own you'll need:
          -A mini binder
          -mini binder tabs
          -mini binder notebook paper
          -fun colored pens

These small binders can be hard to find at Wal-Mart or other grocery store type places, but you can find them online and at places that specialize in office supplies like Office Depot and Staples.  Avery makes one here.

I love the size and the ability to organize.  They're just the right size to carry around. And because it's a binder with pockets, you can move things around as you need and store photos, articles etc in it.

To get started....

1. Decide what you'd like in each tab: table of contents. This will depend on how many tabs you have. You can add as many as you like. You can see in this binder I have 2 different types of tabs. I divided my section 2 tab into 3 different sections.


I made a table of contents for each of my binders/study journals. Because I was a missionary at the time, you can see each tab has to do with my missionary service.  


Now that I am a mom, wife, artist, and lots of other things, my new binder will have the following sections:

1. Personal study- (this includes thoughts each day from scriptures, talks, but generally consisting of my own thought)
2. Meeting notes- LDS folk go to a lot of meetings! This tab is a great place to keep all of that. 
3. Quotes- I absolutely love having an area to write down great quotes that I find. Each of my study journals has a section with this.
4. Parenting- I'm raising a little boy and am always looking for good advice. 
5. Goals- Write down goals, evaluate them often. 

That's all I have right now. Depending on where you are in your life, you can create topics you'd like to focus on. If I were teaching Sunday school, I'd have a tab for lesson preparation.  It's wide open to whatever you want to study. 

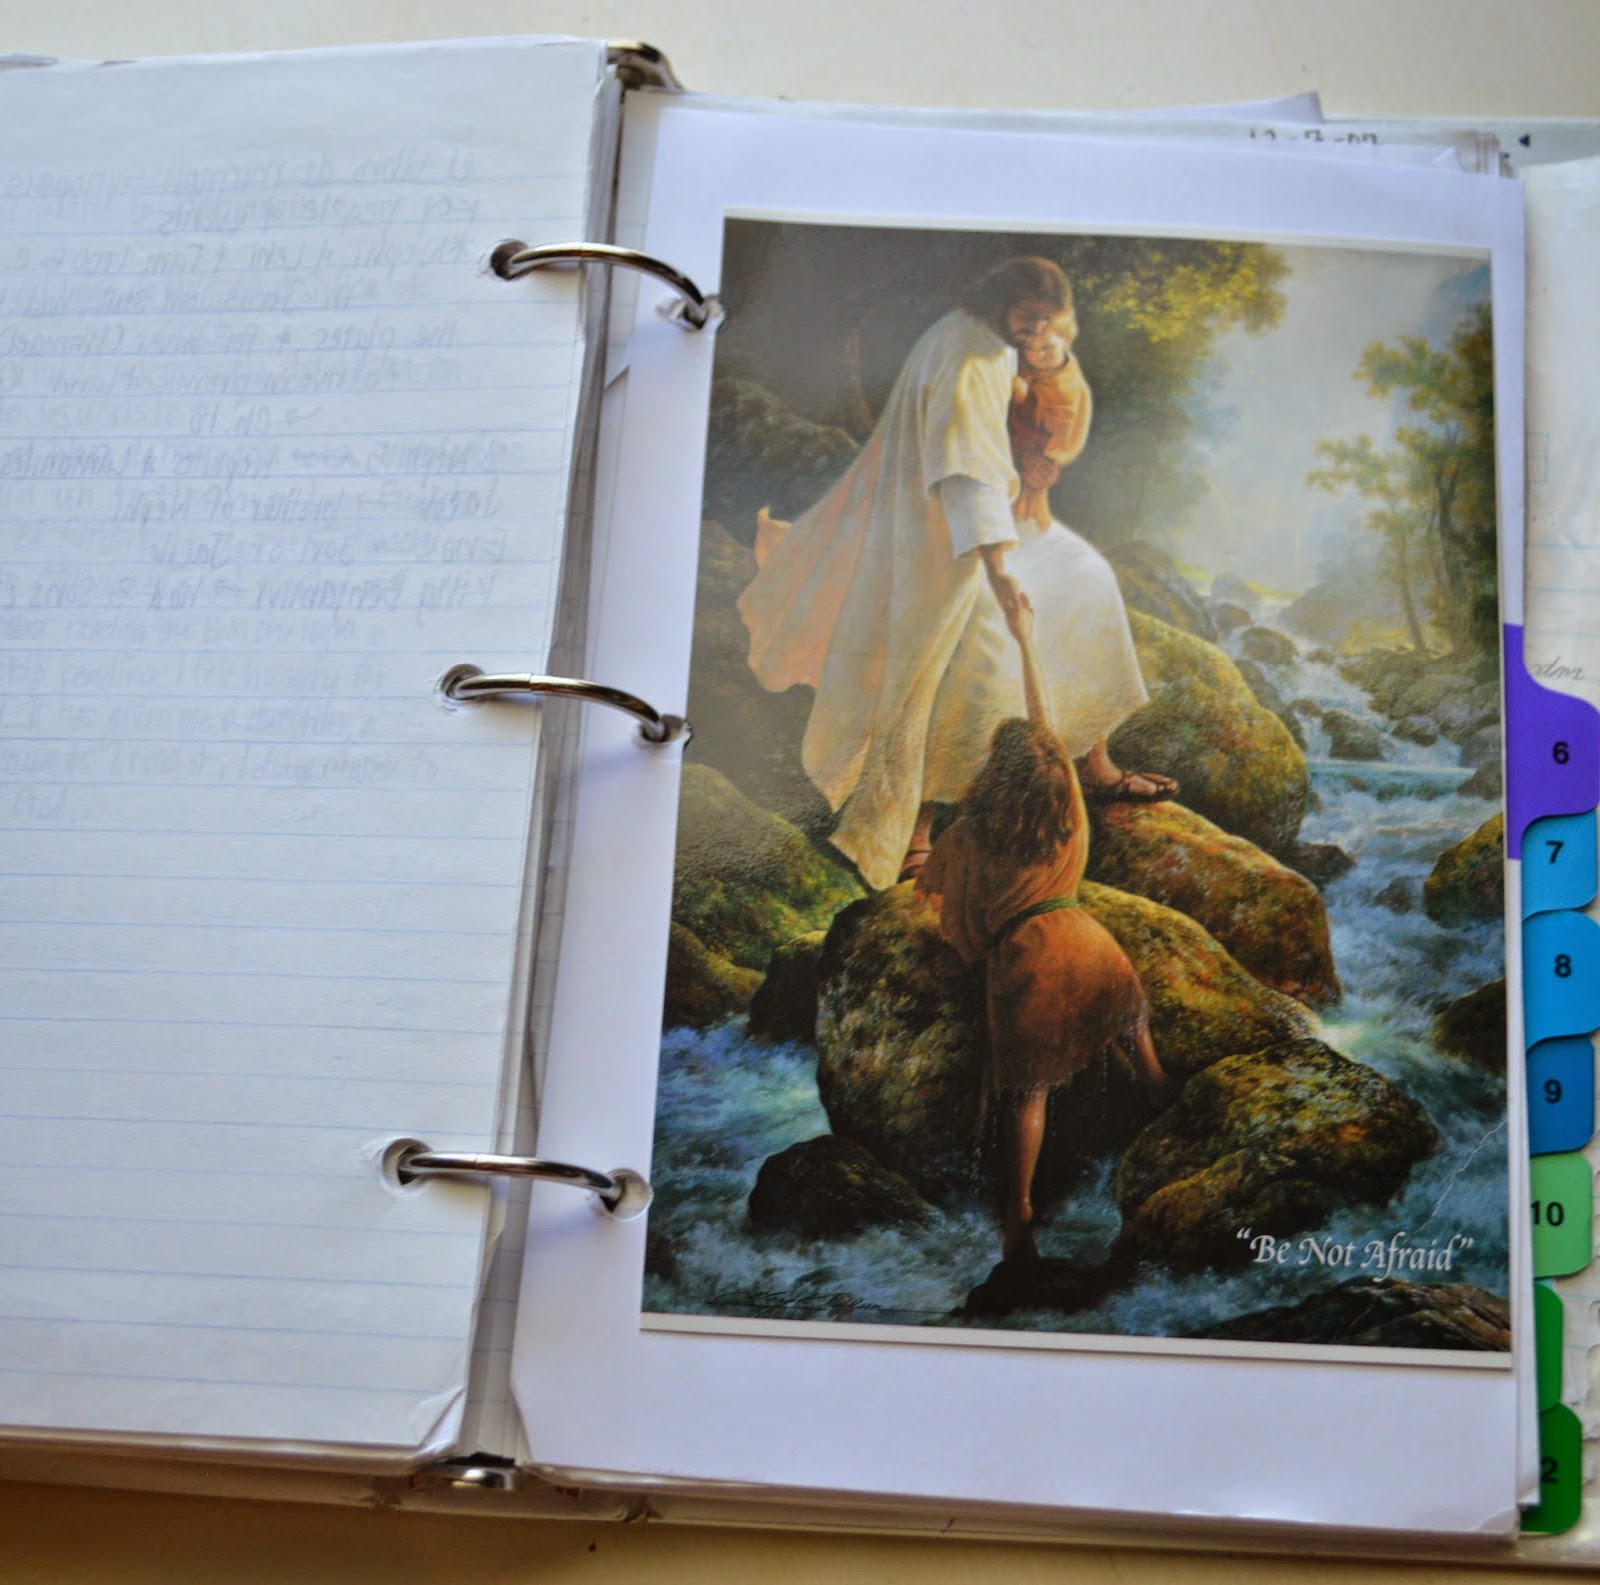
2. Dress it up. You are much more likely to use a study journal that has your stamp on it. I like to cut out images from church magazines and glue them into my tabs, pages, wherever. I also love using different color pens to write and organize my thoughts. Plus it's prettier that way! It also improves my ability to remember where something is I wrote down because I remember the colors I used.


3. Include articles, pamphlets etc.  Some things I study from fit right into the binder. So I just poke holes in them and keep them in my tabs. If you have a talk you'd like to study, shrink it down and then you can include it too.


Most importantly, remember that “Knowledge carefully recorded is knowledge available in time of need. Spiritually sensitive information should be kept in a sacred place that communicates to the Lord how you treasure it. This practice enhances the likelihood of your receiving further light” Elder Richard G. Scott.

Studying the scriptures along with a study journal makes it so much more powerful.  Rather than just reading, organizing your thoughts can make your scripture study so much more meaningful.  

What ways have you organized your scripture study? What helpful tips have you found?